You know, every time I step into the shower and reach for my DIY shampoo bar, I'm reminded of the dual benefits it brings. Not only does it cater to my personal hair care needs, but it also plays a small yet significant role in reducing our environmental footprint.
Did you know that over 552 million plastic shampoo bottles end up in landfills every year?
That's a staggering number, isn't it?
But beyond the environmental concerns, there's another pressing issue. Many commercial shampoos are laden with harmful elements that aren't just bad for our hair and scalp, but also for our planet when they wash down the drain. It's no wonder that shampoo bars, especially homemade shampoo bars, have gained such popularity in our sustainable living community.
So, diving into the key question: "Why not make a DIY shampoo bar?"
In this blog, I'll be sharing multiple recipes to help you craft the perfect shampoo bar tailored to your needs.
Let's embark on this eco-friendly journey together!
Harmful Chemicals in the Commercial Shampoo
While we're on the topic of shampoo bars, let's dive a bit deeper into why making a shampoo bar at home can be a game-changer.
Many store-bought shampoos, or as I like to call them, commercial soap for your hair, are packed with chemicals that aren't just harmful to the environment but can also wreak havoc on our hair and overall health.
1. Sulfates (Ammonium Lauryl Sulfate or Sodium Laureth Sulfate and sodium Lauryl Sulfate):
These are very strong detergents that bind with the sebum on our scalp and with water. While they're great for removing oils and residue, they can damage the hair, making it brittle and increasing frizz.
Especially, Sodium Lauryl Sulfate, which can compromise follicles when left on the scalp and has other toxic effects. Those with color-treated or dry hair should be particularly wary as it can fade your color and strip your strands of natural oils.
2. Parabens:
Used as a preservative, parabens can mimic the hormone estrogen and have been linked to increased growth of breast cancer cells.
3. Sodium Chloride:
Essentially salt, it's added to shampoos to thicken their consistency. However, it can dry out an already-sensitive scalp, leading to potential hair loss.
4. Synthetic Fragrances:
These can contain thousands of hidden chemicals, some of which can disrupt the reproductive system, cause cancer, or asthma. They can also irritate the skin and scalp, leading to hair loss.
5. Other Harmful Ingredients:
From Formaldehyde, a known human carcinogen, to Dimethicone, which contributes to product buildup making hair feel greasy, the list is long and concerning.
It's alarming to think that these ingredients are so common in many shampoos we find on store shelves. But the good news?
By opting for homemade shampoo bars, we can control the shampoo bar ingredients, ensuring they're safe for our hair and the environment. Or, you can try going for commercial organic shampoos.
Ingredients You'll Need To Make Homemade Shampoo Bars
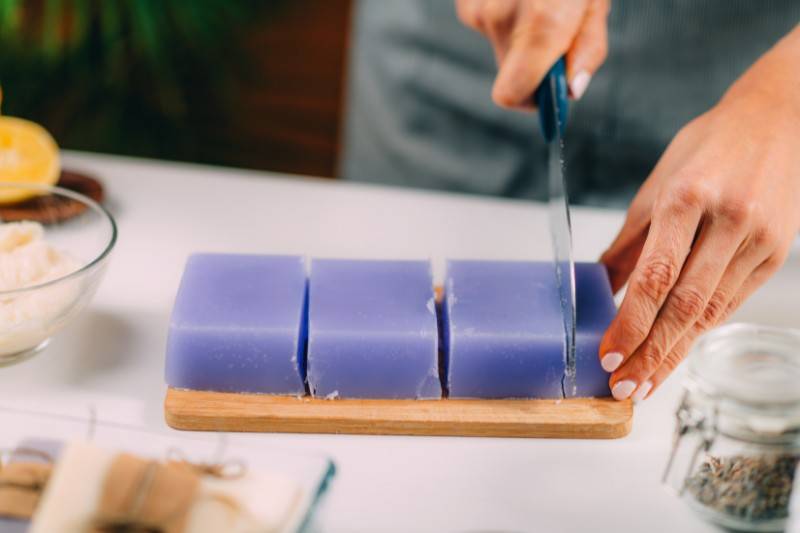
Alright, my eco-warriors, if you're as excited as I am about making shampoo bars, then let's dive right into the ingredients you'll need.
Crafting your own shampoo bars is not just about sustainability; it's also about ensuring that what you put on your scalp is pure, natural, and devoid of harmful chemicals.
Before we jump into the fun add-ins and customization, there are some core ingredients you'll need for your DIY shampoo bar recipe:
Lye (Sodium Hydroxide)
This is a crucial ingredient for the saponification process. It's what turns our oils into soap. Remember to handle it with care and always use it in a well-ventilated area.
Oils
The backbone of our shampoo bars. Common choices include:
- Coconut Oil: Provides a rich lather and is deeply moisturizing.
- Olive Oil: Offers gentle cleansing, perfect for all hair types.
- Castor Oil: Boosts lather and has moisturizing properties.
- Sunflower Oil and sweet Almond Oil: Both are lightweight and won't weigh your hair down.
Water
Needed to activate the lye and start the saponification process.
Soap Mold
To shape your shampoo bars. Silicone molds work great for easy removal.
Safety Tip: Always add lye to water (never the other way around) and mix in a stainless steel bowl. This ensures a safe and controlled reaction.
Optional Add-ins for Customization
Now, for the fun part!
Depending on your hair type, whether it's dry hair, oily hair, or something in between, you can customize your homemade shampoo bar with these add-ins:
| | |
|---|
Essential Oils (e.g., Rosemary Essential Oil) | Add fragrance and have therapeutic properties. | Few drops to 1% of total recipe |
Natural Colorants (e.g., Cocoa Butter) | Impart color to your shampoo bars. | Varies based on desired shade |
Herbs (e.g., Dried Herbs) | Can offer additional benefits like reducing dandruff or boosting shine. | |
| Helps balance the pH of your shampoo bar. | |
| Adds moisturizing properties and softness. | |
Remember, the beauty of making shampoo bars is the freedom to experiment. So, feel free to mix and match ingredients until you find the perfect blend for your hair!
Step-by-Step Guide to Making Your DIY Shampoo Bar
Now that we've got our ingredients sorted, it's time to roll up our sleeves and dive into the soap-making process. By the way, you can make homemade soap bars in the same way too.
Crafting your own shampoo bars is not just a sustainable choice but also a deeply satisfying one.
So, let's get started on this DIY shampoo journey!
Preparing Your Ingredients
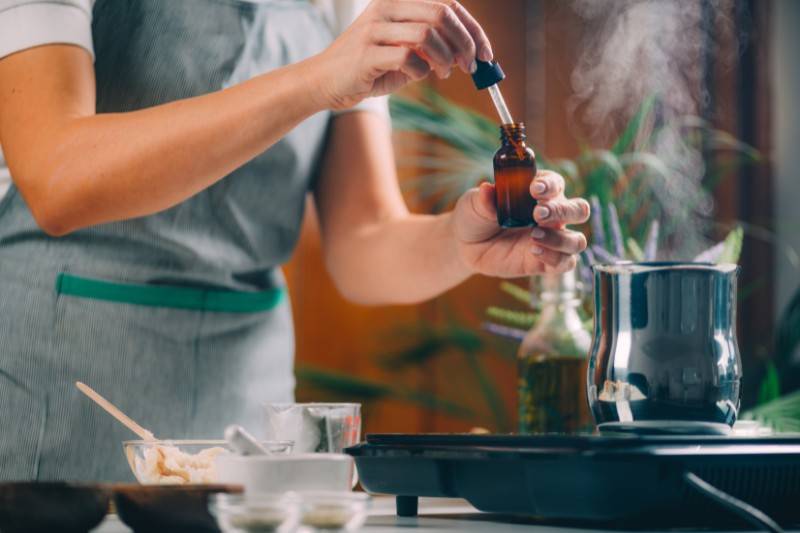
Before we jump into the actual making of the shampoo bars, it's crucial to get everything set up correctly:
- Safety First: Always wear gloves and safety goggles when handling lye (sodium hydroxide). Work in a well-ventilated area, and keep kids and pets away.
- Measuring Ingredients: Using a stainless steel bowl, measure out your oils (coconut oil, olive oil, castor oil, etc.), essential oils, and other add-ins. Ensure you have the right amounts as per your chosen shampoo bar recipe.
- Lye Mixture: In a separate bowl, slowly pour the lye into water (never the other way around) to avoid a volcanic reaction. This will heat up, so let it cool slightly before using.
Mixing and Molding
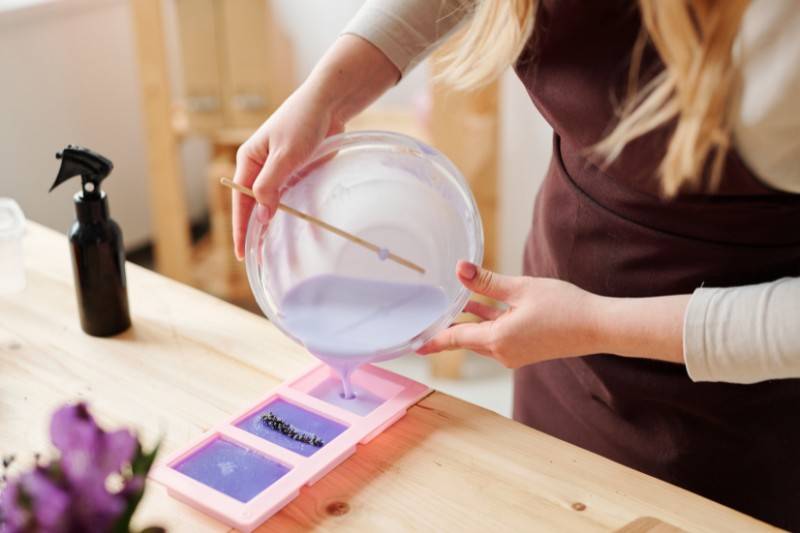
Now, onto the fun part of making shampoo bars:
- Combining Ingredients: Once the lye mixture has cooled, slowly pour it into the oil mixture while stirring. This will initiate the saponification process.
- Blending: Use a stick blender to mix until you achieve a pudding-like consistency, known as 'trace' in the soap making world.
- Adding Essential Oils and Add-ins: Now's the time to add your chosen essential oils, like rosemary essential oil, and other ingredients for customization.
- Molding: Pour the soap mixture into your soap mold. Silicone molds are great as they make it easy to pop out the finished shampoo bars.
Curing and Storing
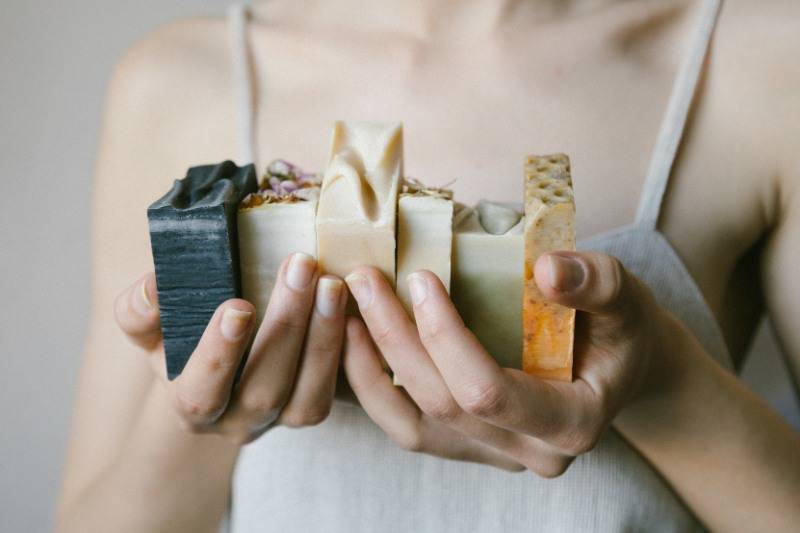
Patience is key here, my friends:
- Curing: Let your shampoo bars sit in the mold for 24-48 hours. After that, remove them and let them cure in a cool, dry place for 4-6 weeks. This allows the saponification process to complete and ensures a milder, longer-lasting bar.
- Storing: Store your homemade shampoo bars in a dry place away from direct sunlight. Remember, the longer they cure, the better they'll be. However, keep in mind the shelf life of the ingredients you've used. Some essential oils or other oils might have a shorter shelf life.
- Usage Tips: For those with dry hair, you can follow up with an apple cider vinegar rinse to balance the pH and add shine. For oily hair types, these bars can help regulate excess oil production over time.
Customizing Your Shampoo Bars for Different Hair Types
One of the most exciting aspects of making shampoo bars is the ability to tailor them to your specific hair type.
Just like we all have unique personalities, our hair has its quirks and needs.
By understanding the properties of various ingredients, you can craft a homemade shampoo bar that's just perfect for you. Let's delve into how you can customize your shampoo bar recipes for different hair types.
For Dry Hair

Dry hair craves moisture, and the right ingredients can provide that much-needed hydration:
- Olive Oil: This oil is a powerhouse when it comes to moisturizing. It penetrates the hair shaft and nourishes from within.
- Shea Butter: Known for its deep moisturizing properties, shea butter can help combat dryness and frizz.
- Coconut Oil: While it's a common ingredient in most shampoo bars, it's especially beneficial for dry hair due to its hydrating properties.
- Essential Oils: Lavender and chamomile essential oils can be soothing and moisturizing.
Recipe Tip: Increase the amount of olive oil and shea butter in your soap base for an extra moisturizing bar.
For Oily Hair
If your scalp tends to produce excess oil, you'll want ingredients that help balance oil production without stripping your hair:
- Castile Soap: This soap base, made primarily from olive oil, provides gentle cleansing without over-drying.
- Sweet Almond Oil: Lightweight and non-greasy, this oil can help regulate sebum production.
- Essential Oils: Lemon and tea tree essential oils can help reduce oiliness and refresh the scalp.
Recipe Tip: Consider adding a touch of citric acid to your shampoo bar recipes to help balance the pH of your scalp, which can deter excess oil production.
For Sensitive Skin
For those with sensitive scalps, it's essential to use gentle, soothing ingredients:
- Goat Milk: This ingredient can be used in the soap base to provide a creamy lather and offer soothing properties.
- Avocado Oil: Rich in vitamins and minerals, avocado oil can nourish without irritating.
- Essential Oils: Chamomile and lavender essential oils are known for their calming effects.
Recipe Tip: Opt for a melt and pour soap base with goat milk for a gentle, soothing shampoo bar.
For Thinning Hair
If you're concerned about thinning hair, certain ingredients can promote hair health and strength:
- Castor Oil: This oil is known to support hair growth and strengthen the roots.
- Argan Oil: Often referred to as 'liquid gold', argan oil can help fortify hair and add shine.
- Essential Oils: Rosemary essential oil can stimulate the scalp and promote hair growth.
Recipe Tip: Incorporate a higher percentage of castor oil in your shampoo bar recipes and consider adding a few drops of rosemary essential oil for added benefits.
Remember, the beauty of DIY is experimentation.
Feel free to mix and match ingredients, adjust quantities, and find what works best for your unique hair type.
Common Mistakes and How to Avoid Them
While making shampoo bars can be a delightful and rewarding experience, there are a few common pitfalls that many, including myself, have stumbled upon in our early soap-making days.
But fear not!
I'm here to share these mistakes with you, so you can sidestep them and craft the perfect shampoo bar right from the get-go.
Overcomplicating the Recipe
I get it; with so many wonderful ingredients at our disposal, it's tempting to throw in a bit of this and a dash of that.
But here's the thing:
Too Many Ingredients
When we add too many ingredients, not only does it become challenging to determine the right proportions, but it can also lead to a bar that doesn't hold together well or doesn't lather as desired. Plus, if any issues arise, it's harder to pinpoint the culprit.
Simplicity is Key
Some of the best shampoo bars I've made (and loved by many of you!) have been the ones with fewer, high-quality ingredients. Remember, each ingredient should have a purpose, whether it's for lather, moisturizing, or scent.
Tip: Start with a basic recipe and then, as you become more comfortable, experiment by introducing one new ingredient at a time. This way, you can observe its effects and adjust accordingly.
Not Allowing Proper Curing Time
Patience is a virtue, especially in soap making:
Risks of Uncured Bars
Using a shampoo bar that hasn't been adequately cured can result in a bar that's too soft and melts away quickly. Moreover, uncured bars might still have active lye, which can be harsh on the hair and scalp.
Signs of a Fully Cured Bar
A well-cured bar will feel hard to the touch and will have a somewhat matte appearance. If you're unsure, you can always do a pH test. A fully cured shampoo bar should have a pH between 6 and 8.
Tip: Always mark the date when you unmold your bars and set a reminder for the curing period's end. And remember, while it's tempting to use your new creation immediately, giving it the proper time to cure will ensure a longer-lasting, gentler bar.
Frequently Asked Questions (FAQs)
How do you make homemade shampoo bars?
Mix oils with lye to start the saponification process, add desired ingredients, pour into molds, and let cure for several weeks.
Are homemade shampoo bars good for your hair?
Yes, they're made with natural ingredients tailored to hair needs and are free from harmful chemicals.
Can I make shampoo bars without lye?
While lye is essential for saponification, you can use "melt and pour" soap bases to avoid handling lye directly.
How to make shampoo bars like Lush?
Use high-quality ingredients and essential oils. Incorporate shea butter, cocoa butter, and experiment to find the right blend.
Conclusion
As we wrap up our deep dive into the world of DIY shampoo bars, I can't help but reflect on the incredible journey we've embarked on together.
Crafting your own shampoo bars is not just an act of sustainability; it's a declaration of self-care, ensuring that what graces our scalp is pure, natural, and lovingly made.
The joys of making shampoo bars extend beyond the eco-friendly aspect. It's about the empowerment of creating something tailored just for you, understanding each ingredient, and the satisfaction of using a product crafted by your own hands.
I encourage you to embrace the art of experimentation.
Maybe your first bar won't be perfect, or perhaps it'll be the best thing you've ever made. But with each batch, you'll learn, adapt, and inch closer to crafting that perfect shampoo bar suited just for you.
So, here's to sustainable living, healthier hair, and the endless possibilities that await in every homemade shampoo bar.
Happy crafting, my friends!
Green Blog
How to Make DIY Shampoo Bars
Written by : Samira Tasneem | Last Updated: April 22, 2024
Contents
Dive into the world of DIY shampoo bars: a blend of sustainability, self-care, and science. Discover tailored recipes, avoid pitfalls, and embrace eco-luxury hair care!
You know, every time I step into the shower and reach for my DIY shampoo bar, I'm reminded of the dual benefits it brings. Not only does it cater to my personal hair care needs, but it also plays a small yet significant role in reducing our environmental footprint.
Did you know that over 552 million plastic shampoo bottles end up in landfills every year?
That's a staggering number, isn't it?
But beyond the environmental concerns, there's another pressing issue. Many commercial shampoos are laden with harmful elements that aren't just bad for our hair and scalp, but also for our planet when they wash down the drain. It's no wonder that shampoo bars, especially homemade shampoo bars, have gained such popularity in our sustainable living community.
So, diving into the key question: "Why not make a DIY shampoo bar?"
In this blog, I'll be sharing multiple recipes to help you craft the perfect shampoo bar tailored to your needs.
Let's embark on this eco-friendly journey together!
Harmful Chemicals in the Commercial Shampoo
While we're on the topic of shampoo bars, let's dive a bit deeper into why making a shampoo bar at home can be a game-changer.
Many store-bought shampoos, or as I like to call them, commercial soap for your hair, are packed with chemicals that aren't just harmful to the environment but can also wreak havoc on our hair and overall health.
1. Sulfates (Ammonium Lauryl Sulfate or Sodium Laureth Sulfate and sodium Lauryl Sulfate):
These are very strong detergents that bind with the sebum on our scalp and with water. While they're great for removing oils and residue, they can damage the hair, making it brittle and increasing frizz.
Especially, Sodium Lauryl Sulfate, which can compromise follicles when left on the scalp and has other toxic effects. Those with color-treated or dry hair should be particularly wary as it can fade your color and strip your strands of natural oils.
2. Parabens:
Used as a preservative, parabens can mimic the hormone estrogen and have been linked to increased growth of breast cancer cells.
3. Sodium Chloride:
Essentially salt, it's added to shampoos to thicken their consistency. However, it can dry out an already-sensitive scalp, leading to potential hair loss.
4. Synthetic Fragrances:
These can contain thousands of hidden chemicals, some of which can disrupt the reproductive system, cause cancer, or asthma. They can also irritate the skin and scalp, leading to hair loss.
5. Other Harmful Ingredients:
From Formaldehyde, a known human carcinogen, to Dimethicone, which contributes to product buildup making hair feel greasy, the list is long and concerning.
It's alarming to think that these ingredients are so common in many shampoos we find on store shelves. But the good news?
By opting for homemade shampoo bars, we can control the shampoo bar ingredients, ensuring they're safe for our hair and the environment. Or, you can try going for commercial organic shampoos.
Ingredients You'll Need To Make Homemade Shampoo Bars
Alright, my eco-warriors, if you're as excited as I am about making shampoo bars, then let's dive right into the ingredients you'll need.
Crafting your own shampoo bars is not just about sustainability; it's also about ensuring that what you put on your scalp is pure, natural, and devoid of harmful chemicals.
Before we jump into the fun add-ins and customization, there are some core ingredients you'll need for your DIY shampoo bar recipe:
Lye (Sodium Hydroxide)
This is a crucial ingredient for the saponification process. It's what turns our oils into soap. Remember to handle it with care and always use it in a well-ventilated area.
Oils
The backbone of our shampoo bars. Common choices include:
Water
Needed to activate the lye and start the saponification process.
Soap Mold
To shape your shampoo bars. Silicone molds work great for easy removal.
Safety Tip: Always add lye to water (never the other way around) and mix in a stainless steel bowl. This ensures a safe and controlled reaction.
Optional Add-ins for Customization
Now, for the fun part!
Depending on your hair type, whether it's dry hair, oily hair, or something in between, you can customize your homemade shampoo bar with these add-ins:
Ingredient
Benefits
Recommended Amount
Essential Oils (e.g., Rosemary Essential Oil)
Add fragrance and have therapeutic properties.
Few drops to 1% of total recipe
Natural Colorants (e.g., Cocoa Butter)
Impart color to your shampoo bars.
Varies based on desired shade
Herbs (e.g., Dried Herbs)
Can offer additional benefits like reducing dandruff or boosting shine.
1-2 tsp per batch
Apple Cider Vinegar
Helps balance the pH of your shampoo bar.
1-2 tbsp per batch
Shea Butter
Adds moisturizing properties and softness.
5-10% of total oils
Remember, the beauty of making shampoo bars is the freedom to experiment. So, feel free to mix and match ingredients until you find the perfect blend for your hair!
Step-by-Step Guide to Making Your DIY Shampoo Bar
Now that we've got our ingredients sorted, it's time to roll up our sleeves and dive into the soap-making process. By the way, you can make homemade soap bars in the same way too.
Crafting your own shampoo bars is not just a sustainable choice but also a deeply satisfying one.
So, let's get started on this DIY shampoo journey!
Preparing Your Ingredients
Before we jump into the actual making of the shampoo bars, it's crucial to get everything set up correctly:
Mixing and Molding
Now, onto the fun part of making shampoo bars:
Curing and Storing
Patience is key here, my friends:
Customizing Your Shampoo Bars for Different Hair Types
One of the most exciting aspects of making shampoo bars is the ability to tailor them to your specific hair type.
Just like we all have unique personalities, our hair has its quirks and needs.
By understanding the properties of various ingredients, you can craft a homemade shampoo bar that's just perfect for you. Let's delve into how you can customize your shampoo bar recipes for different hair types.
For Dry Hair
Dry hair craves moisture, and the right ingredients can provide that much-needed hydration:
Recipe Tip: Increase the amount of olive oil and shea butter in your soap base for an extra moisturizing bar.
For Oily Hair
If your scalp tends to produce excess oil, you'll want ingredients that help balance oil production without stripping your hair:
Recipe Tip: Consider adding a touch of citric acid to your shampoo bar recipes to help balance the pH of your scalp, which can deter excess oil production.
For Sensitive Skin
For those with sensitive scalps, it's essential to use gentle, soothing ingredients:
Recipe Tip: Opt for a melt and pour soap base with goat milk for a gentle, soothing shampoo bar.
For Thinning Hair
If you're concerned about thinning hair, certain ingredients can promote hair health and strength:
Recipe Tip: Incorporate a higher percentage of castor oil in your shampoo bar recipes and consider adding a few drops of rosemary essential oil for added benefits.
Remember, the beauty of DIY is experimentation.
Feel free to mix and match ingredients, adjust quantities, and find what works best for your unique hair type.
Common Mistakes and How to Avoid Them
While making shampoo bars can be a delightful and rewarding experience, there are a few common pitfalls that many, including myself, have stumbled upon in our early soap-making days.
But fear not!
I'm here to share these mistakes with you, so you can sidestep them and craft the perfect shampoo bar right from the get-go.
Overcomplicating the Recipe
I get it; with so many wonderful ingredients at our disposal, it's tempting to throw in a bit of this and a dash of that.
But here's the thing:
Too Many Ingredients
When we add too many ingredients, not only does it become challenging to determine the right proportions, but it can also lead to a bar that doesn't hold together well or doesn't lather as desired. Plus, if any issues arise, it's harder to pinpoint the culprit.
Simplicity is Key
Some of the best shampoo bars I've made (and loved by many of you!) have been the ones with fewer, high-quality ingredients. Remember, each ingredient should have a purpose, whether it's for lather, moisturizing, or scent.
Tip: Start with a basic recipe and then, as you become more comfortable, experiment by introducing one new ingredient at a time. This way, you can observe its effects and adjust accordingly.
Not Allowing Proper Curing Time
Patience is a virtue, especially in soap making:
Risks of Uncured Bars
Using a shampoo bar that hasn't been adequately cured can result in a bar that's too soft and melts away quickly. Moreover, uncured bars might still have active lye, which can be harsh on the hair and scalp.
Signs of a Fully Cured Bar
A well-cured bar will feel hard to the touch and will have a somewhat matte appearance. If you're unsure, you can always do a pH test. A fully cured shampoo bar should have a pH between 6 and 8.
Tip: Always mark the date when you unmold your bars and set a reminder for the curing period's end. And remember, while it's tempting to use your new creation immediately, giving it the proper time to cure will ensure a longer-lasting, gentler bar.
Frequently Asked Questions (FAQs)
How do you make homemade shampoo bars?
Mix oils with lye to start the saponification process, add desired ingredients, pour into molds, and let cure for several weeks.
Are homemade shampoo bars good for your hair?
Yes, they're made with natural ingredients tailored to hair needs and are free from harmful chemicals.
Can I make shampoo bars without lye?
While lye is essential for saponification, you can use "melt and pour" soap bases to avoid handling lye directly.
How to make shampoo bars like Lush?
Use high-quality ingredients and essential oils. Incorporate shea butter, cocoa butter, and experiment to find the right blend.
Conclusion
As we wrap up our deep dive into the world of DIY shampoo bars, I can't help but reflect on the incredible journey we've embarked on together.
Crafting your own shampoo bars is not just an act of sustainability; it's a declaration of self-care, ensuring that what graces our scalp is pure, natural, and lovingly made.
The joys of making shampoo bars extend beyond the eco-friendly aspect. It's about the empowerment of creating something tailored just for you, understanding each ingredient, and the satisfaction of using a product crafted by your own hands.
I encourage you to embrace the art of experimentation.
Maybe your first bar won't be perfect, or perhaps it'll be the best thing you've ever made. But with each batch, you'll learn, adapt, and inch closer to crafting that perfect shampoo bar suited just for you.
So, here's to sustainable living, healthier hair, and the endless possibilities that await in every homemade shampoo bar.
Happy crafting, my friends!
Samira Tasneem
Samira is an Electronics and Communications Engineer by profession, but deep inside, her heart is a nomad! She's a state champion debater, a public speaker, a scriptwriter, a theater actress, but most importantly — A GREEN CITIZEN! She thinks of herself as a storyteller who thrives on enjoying the life at fullest and telling everyone the tales of life.
Quick Links
Green Living Guides
Green Jobs
Inspiring Green News
Green Directory
Green Store
Electronics Recycling
Category: Green Blog, Lifestyle, Natural Cleaning, Sustainable Living